Setup your own Blog Like this…
Generally follow this link
Install Hugo on macOS (Homebrew):
Type in console:
- brew install hugo
Register on Git
Create Page
- hugo new site sitename
- cd sitename
Select Theme
- git init
- cd themes
- git submodule add https://github.com/budparr/gohugotheme-ananke.git themes/ananke
Open config.toml in a text editor and add theme = “ananke”
Local test
- hugo server -D
See http://localhost:1313/ in the browser.
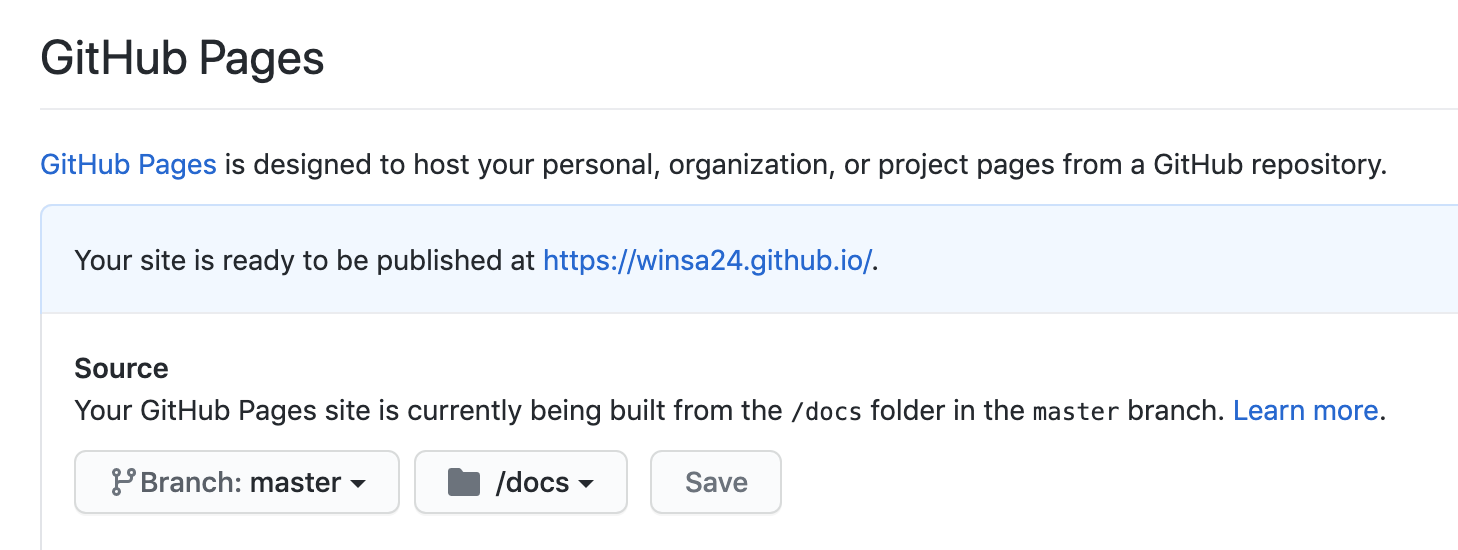
Deployment
- Add publishDir = “docs” to the config.toml
- Set baseURL = “https://
.github.io/ ” in the config.toml - Got to the settings page of the repository and enable GitHub pages to use the docs folder
Some tips…
Useful tutorial links to follow:
https://gohugo.io/getting-started/installing/
https://gohugo.io/hosting-and-deployment/hosting-on-github/
One thing need to be careful: DON’T forget to modify the settings in GitHub settings
Also remind to read the theme’s readme If I want to modify the theme, go to https://themes.gohugo.io/
Write in Markdown grammar
Ways to update the pages:
rm -rf docs (optional)
Hugo
git add .
git commit -m “something"
git push origin master
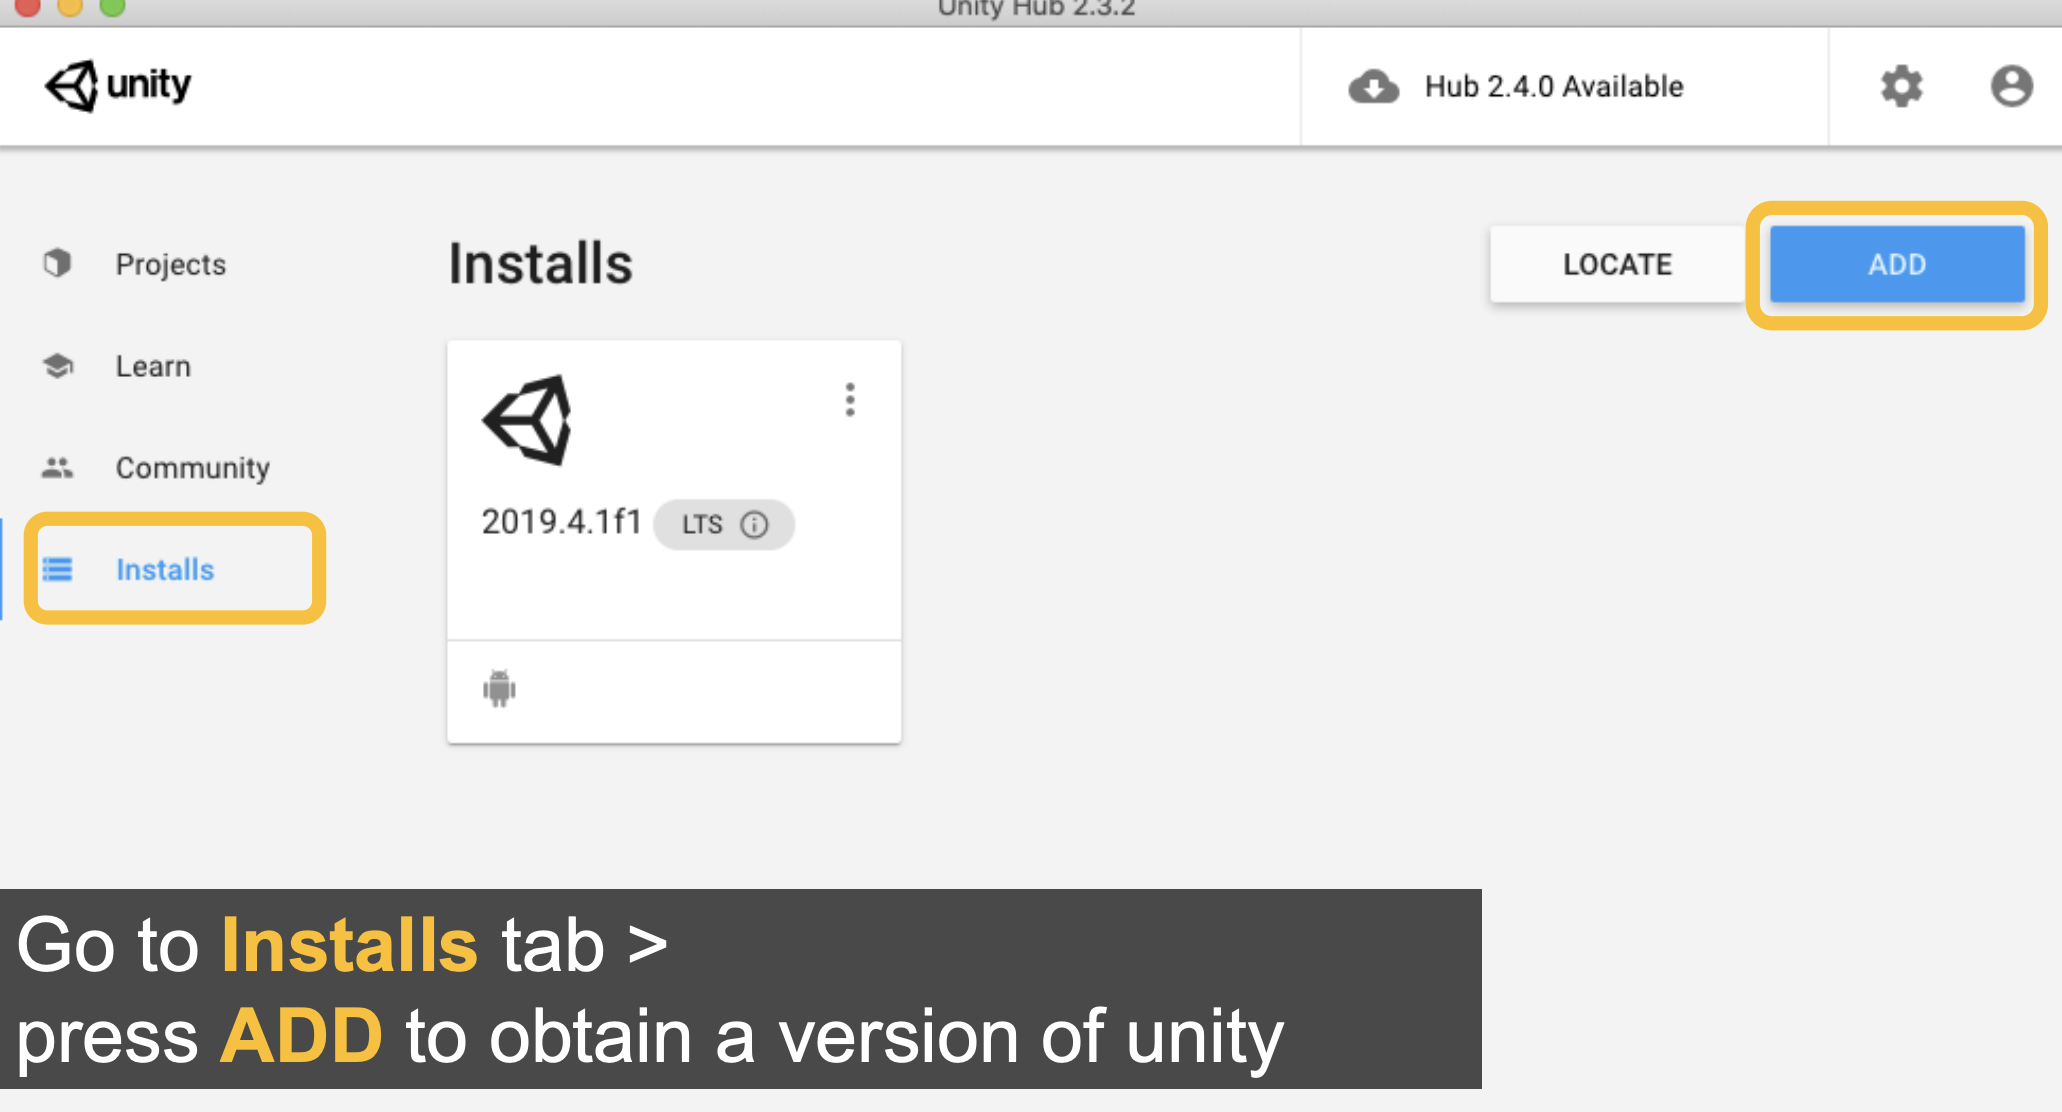
Setup Unity
Download Unity Hub from https://unity3d.com/get-unity/download
Inside Unity Hub click Install on the right menu bar and add different version.
 Then click Project to new a project!